Saturday, December 1, 2012

Review of Flanders Red

I finally got around to writing down tasting notes from our cabernet franc-barrel Flanders Red. This beer spent a year in the barrel before we bottled it in December 2011. This review is from August 2012, so around 8.5 months in the bottle. I'd say the beer was a huge success, and it should only get better as it ages. Looking forward to re-reviewing this every year or so.

Aroma: Vinous malt, bright acid, cherry-funk. Chocolate -- probably from the oak? No acetic acid to note. That might be a nice addition here.

Appearance: Tight, lacy bubbles. Nice lacing. Totally clear, bright reddish-amber. A very attractive beer.

Flavor: Complex malt profile - grape skins, caramel maltiness. Bright, lemony acidity that puts it well on the dry/sour side rather than the sweet/malty side. The oak is there but relatively subtle - it seems to have faded a bit in the bottle. The oak mostly present as it dries out the finish. I think this beer could use some more age to help develop dark fruit characteristics.

Mouthfeel: Perfect- creamy, soft carbonation, but dry. Acid lightens everything up. Very light oak-pucker on the finish, like that tannic resin feel you get from red wine.

Overall impression: Really enjoyable beer and to style. Some raisin/prune character and a bit of acetic acid would really take this beer to the next level. This beer should age very well.

Friday, December 30, 2011

An update on the barrel projects

We all got together over Christmas, so its time to post an update on our two barrel projects (Flanders red and Lambic).

Flanders Red
: The Flanders red is now 1 year old and tasted so damn good that we decided to bottle it. Back in late September several of the brewers tasted this beer and they all said it wasn't very sour, but was showing promise. Something magical must have happened in the past 3 months, because now it is beautifully sour and right in-line with the acidity expected in this style. So on 12/28/2011 we bottled the entire barrel, ending up with around 49 gal bottled (nearly 10 gallons each!).


Our Flanders red, all bottled (plus 2 kegs).

The final gravity of this beer was 1.004, down from 1.006 in September. The abv is 7.3%, so a little high for the style, but we plan on aging this one for a long time. We targeted ~2.3 vols CO2 for bottle conditioning, which is relatively low and should provide a bit of a buffer in case the final gravity comes down any more. To do this we primed with 20 g sugar/gallon.

The beer is very nice: dry, oaky, and acidic. I'm going to wait till some bottles carb up for a proper review. So far this beer far surpassed my expectations and I'm thrilled to have 10 gallons of this to enjoy for years to come.

Lambic:
Our 8-month-old tasting of this beer did not impress. It was insanely bretty, completely pale and clear, and basically had no acidity. I'm very happy to report that the beer has done a complete 180 and now drinks like a real lambic. The acidity is there and roughly comparable in strength to a typical Cantillon lambic. The nose has calmed way down and the brett is far more tame and complex. And the beer has darkened up a bit and has some body. Here is a review of our 24-month sample:


Matt with the lambic.


Appearance - Golden yellow, more cloudy than before, slick and a bit oily in the glass.

Aroma - Dry white wine, light sulfur aroma. Soft, overripe lemons. Some oak. Big-time lambic funk, like the classics but a bit more intense. Almost eggy?

Taste - Bright acidity, slight diacetyl finish. Up front a bit of sweetness, like light pilsner malt, but cut right away by a bracing acidity. Could even be a touch more sour, although as it is, it is already more sour than many commercial lambics (with the exception of maybe Girardin and some Cantillon blends).

Overall - Awesome! Since our tasting in August of 2010 we have been worried about whether the acidity in this beer would ever develop. It definitely has. The aroma is way more refined than before, and the color is now correct. Surely the Pediococcus had a good summer. There is still a hint of diacetyl on the finish so it still has to clean up a bit. Also, there is a weird aroma, almost like eggs or sulfur, which wasn't there before. Perhaps this is another byproduct of the acid-producing bacteria. The mouthfeel is a lot fuller and slicker than before. Strangely, the final gravity seems to have increased by 1 point (currently 1.012, at 8 months it was 1.011). I am guessing the slipperyness (which was probably created by the Pediococcus) may be increasing the FG a bit. We'll keep an eye on the FG over the coming months to see how stable it remains. If it doesn't change at all, we'll probably bottle this one sometime in the summer.


So far I am extremely pleased by the quality of the beers coming out of our barrels. There is such a complexity from the extended aging on oak; it seems like this would be hard to replicate in a carboy. 

Sunday, February 27, 2011

Allagash Odyssey clone

The first time I tried Allagash Odyssey, I was supremely impressed. This is a special beer: it is technically a Belgian Quad, but it is also a wheat beer, and darker than most quads. A portion of it is aged in new American oak barrels, and is blended before bottling. The result is a complex chocolate-covered cherry character, the sweetness of which is tempered by the typical Belgian-esque dryness and the drying oak finish. This is a big beer yet subtle where it counts; suitable for long-term aging and special occasions.

Being so impressed with this beer, I thought it couldn't hurt to email Allagash and ask for tips on how to brew this thing. I was pleasantly surprised when they responded to me with more than enough info to formulate a clone recipe. One of the big surprises for me was the simple grain bill: nothing more than American 2-row, red wheat malt, and roasted barley. Cane sugar is also used. Tettnang and Hallertau hops in the kettle. But the key, I was told, was the extended aging. About 1/5 of the batch is aged in fresh medium-toast American oak barrels (the rest is aged in stainless) for 10 months (!!) prior to bottling.

Regarding recipe formulation: I wasn't told the specific percentages of each grain used, but to my eyes an SRM of mid-20s seemed about right, so about 3.5% roasted barley. On their website they call this a "wheat beer", which implied to me a substantial portion of wheat, so I went with 40%. This is a highly-attenuated beer (something around 91%), so a big addition of cane sugar seemed appropriate: we went with 13.6%. One thing worth noting: the starting and final gravities of this beer took some guesswork: I was told by the brewer they target 1.080, but the website says 1.086. The latter gravity seems about right, as the abv is listed at 10.4%; this would require a final gravity of 1.007 (vs. 1.001 if the og was 1.080--that is way too dry). Also, I guessed the IBUs at around 30-- this is slightly on the high side for a quad, but since it would be aged for a while the extra IBUs would fade a bit over time. The final x-factor was yeast selection. I was told by the brewer that they use their house strain, but that any commercial strain described as having spicy esters could work. I looked long and hard on the internet, but could not find reliable info as to the identity of the Allagash house strain. Their flagship beer is a witbier (and a damn good one), so I would assume their house yeast should first and foremost be a good witbier yeast. I decided on Wyeast 3522 (Ardennes) which is described by Wyeast as producing "a beautiful balance of delicate fruit esters and subtle spicy notes". I'm still not sure this is the right yeast- it seemed a little too fruity. Next time it might be worth culturing dregs from Allagash White (this beer is bottle conditioned with the fermentation strain, so this should be representative of their "house" strain). Finally, we were not willing to buy a wine barrel, so oak cubes seemed like a good option. The oak in Odyssey is subtle and integrated, so the brewer recommended a low quantity of oak over an extended aging period. We decided on 1/2 oz for 3 months (we weren't willing to wait 10 months for our first attempt, maybe next time though!).


Allagash Odyssey clone v1
Belgian quad
6.25 gal batch, brewed 9/25/10

8 lbs US 2-row (Rahr)
7.2 lbs Red wheat malt (Rahr)
0.65 lbs Roasted barley (Simpson's)
2.5 lbs Organic table sugar (added at end of boil)

2 oz Hallertau (4.2% aa) @ 65 min
2 oz Tettnang (3.5% aa) @ 20 min

starting gravity 1.084
final gravity 1.008
10.0% abv
30 IBUs
25 SRM

Yeast propagation: Wyeast 3522, 4-day-old starter, 1.5 gal
Water profile: Custom based on various Trappist breweries (78 ppm Ca++, 7.7 ppm Mg++, 19 ppm Cl-, 30 ppm SO4, 23 ppm Na+, 162 ppm carbonate)
Mash at 147 for 60 minutes
Pitched at 64 F, let rise to 69 F for first 4 days, over next 5 days letting rise to 74 F.

9/26 - Pitched @ 64 F
10/20 - Down to 1.008. Tasted fantastic.
10/27 - Racked, purging secondary w/ CO2. Added 1/2 oz of oak cubes (medium-plus toast) boiled for about 1 minute prior to use
1/22 - Bottled. Tasted great but oak was mellow.

Review 2/27: Blind taste-test with a real Allagash Odyssey
(I should note that, although this started as a blind tasting, we both instantly recognized the real Allagash Odyssey as it was already 2 years old at this point (bottling from Sept. 2009). So, it isn't really appropriate to compare a 2-year-old beer to a fresh beer, but it's the best we could do.)

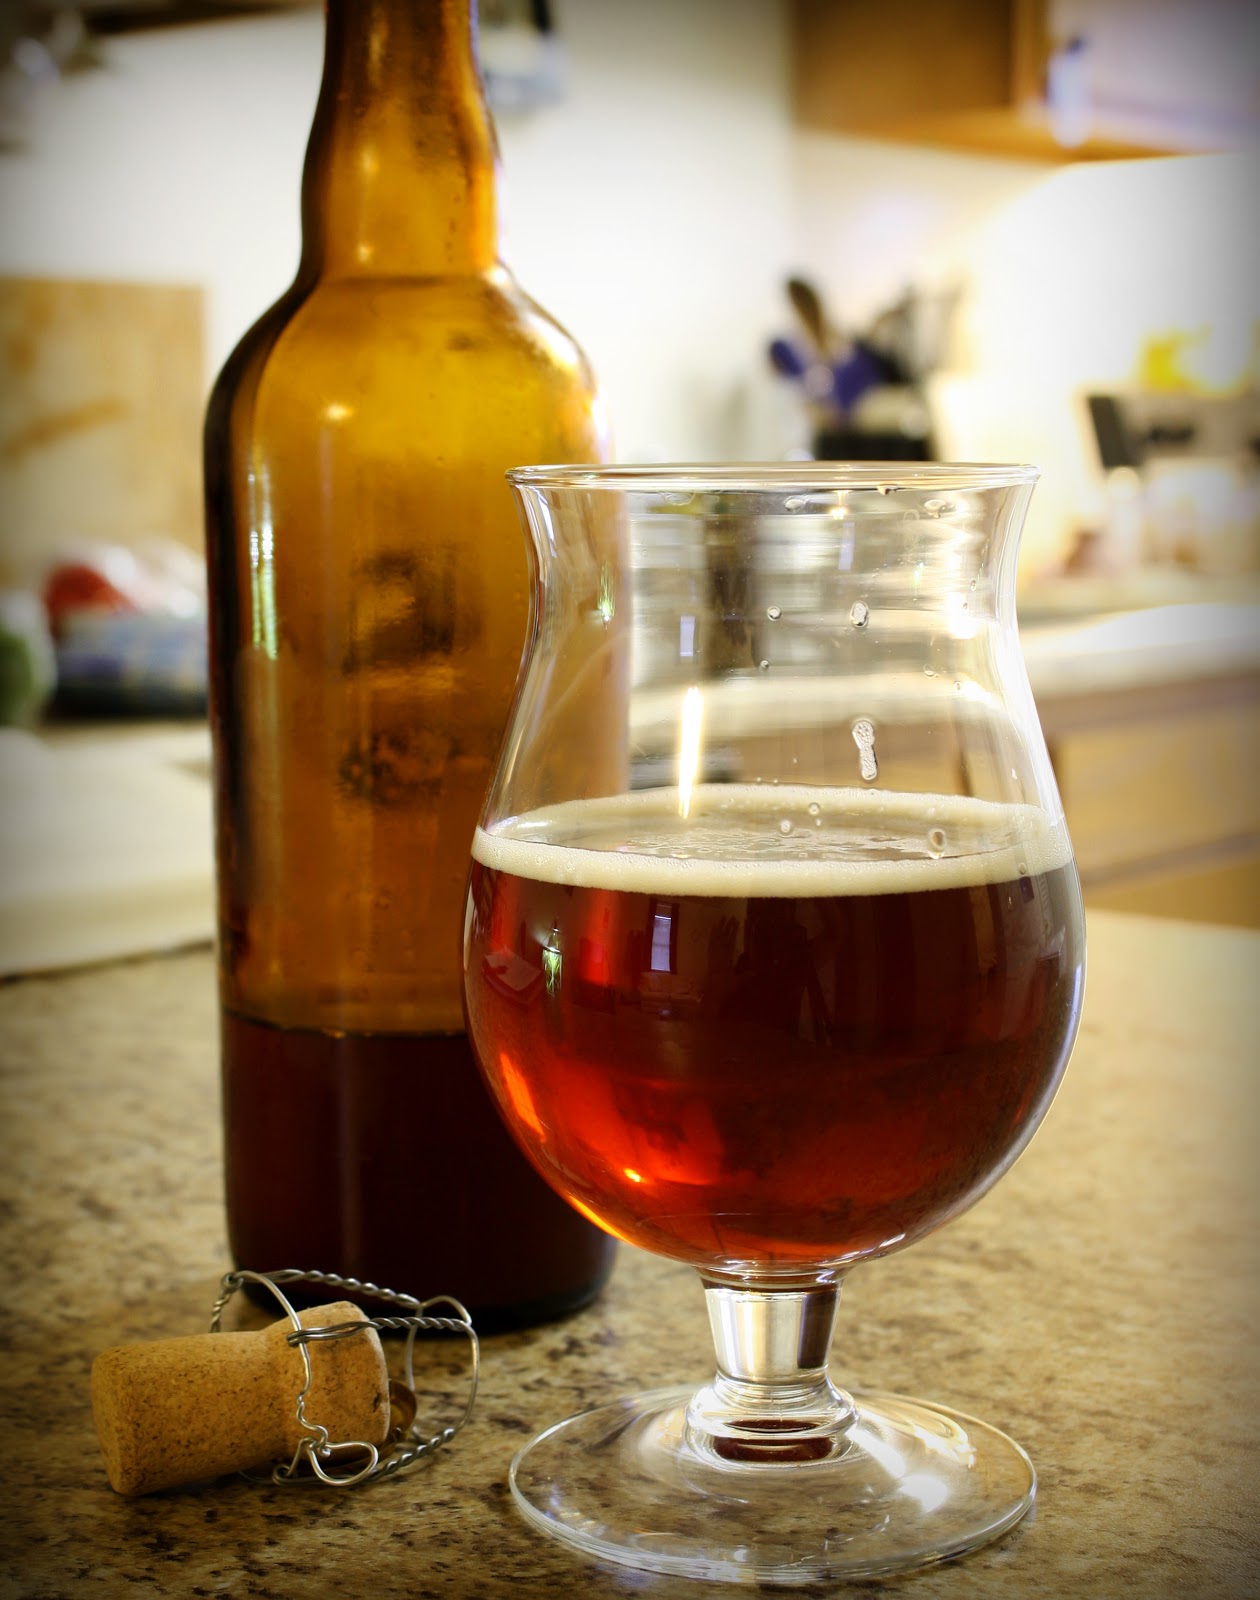
Appearance - Color is practically identical (Corey swears his Allagash sample is more reddish). Allagash has a bit more lacing. Ok, now that the homebrew warmed up a little, it has more lacing.

Aroma - Ours is much more oaky, less dark fruit character, much fresher. By comparison the Allagash smells "old", almost oxidized. The real one has a definite date-like aroma. It seems to have lost some complexity, so for future reference I don't think I'll age Odyssey longer than a year or so. Ours has a bit more fusel heat; overripe cherries, woody, chocolate.

Flavor - Ours: Dark fruit, oak finish, faint chocolate. Brighter, less muted than the Allagash, but generally pretty similar. Allagash has less oak character than ours, but this oak character seems to be a lot lower than I remember in previous bottles of Odyssey (no doubt due to the extended aging of this bottle). Ours is a bit sweeter, which could be due to the fact that the carbonation is a bit lower than the Allagash.

Mouthfeel - Ours is a bit fuller and the carbonation is slightly lower. But even the Allagash has pretty low carbonation, more like the carbonation you'd expect in a pale ale, not highly carbonated like many Belgian beers (I have been told by the brewery that this is normal and intentional.) Allagash has a little more oak on the finish, not so much flavor, but more in how it dries out your mouth a little.

Overall - I like our homebrew substantially better. Corey liked the Allagash better mostly because he liked the dark fruit flavors which had really developed with age (maybe too much for my taste). I think the Allagash is a bit past its prime. Would be good to try bottles of similar age. Maybe use a little more oak next time, either that, or use the same amount of oak but try aging longer. Rethink yeast selection? In any case, I am very happy with this beer. Very complex, alcohol well hidden, but warming. Would be a very nice beer to sip at a fireplace.

Monday, February 21, 2011

LEX: An Imperial stout

Back in May, my friend Tommy and I decided to try brewing Mike Riddle's "Tricentennial Stout" from the book "Brewing Classic Styles". The first thing you will notice about this beer is that the grain bill is crazy. First, it boasts a full 5 lbs of roasted malts for a 6 gallon batch. Second, it calls for a target final gravity of 1.037. Third, it recommends a relatively warm fermentation temperature of 68-70 F, which should produce substantial diacetyl when using the recommended yeast (Wyeast 1084 - Irish ale). Yet, despite all these seemingly crazy recommendations, the brewer, Mike Riddle, justifies each one. The idea is that all that roast requires balance, so the high FG plus the diacetyl will help in that regard. Also, he recommends extended aging, which should allow the intense roastiness to mellow and start producing some complex flavors and aromas.

As a firm believer in the maxim 'Fortune favors the bold', this seemed like a good recipe to try. It pushes the envelope in several respects, so we thought it would be a good learning experience for our first real attempt at brewing an Imperial stout.


An extremely black wort.


Russian imperial stout
~6 gal batch, brewed 5/7/2010 at Tommy's parents' house

20 lbs Maris otter
2.5 lbs Chocolate malt
2.5 lbs Roasted barley
2 lbs Wheat malt
0.85 lbs Crystal 120

2.6 oz Northern Brewer (6.5% aa) @ 60 min
2 oz Northern Brewer @ 30 min
2 oz East Kent Goldings (5% aa) @ 15 min
3 oz EKG @ 3 min
2 oz EKG dry hop (added roughly 3 weeks prior to bottling)

1.102 OG
1.034 FG
8.9% abv
73 IBUs

Yeast propagation: Wyeast 1084, cake from a small batch of oatmeal stout
Single infusion mash at 156 F
Only water adjustment was 5.2 buffer (used N. Andover tap water)
Cast out 6 gal, approx 60.5% brewhouse efficiency
Fermented in a basement, ambient was probably low 60s, so this thing probably rode up into the high 60 while it was rocking (and it really rocked hard! using a yeast cake + injecting pure O2 makes for a very vigorous ferment!)

Review 2/21/11, about 6 weeks in bottle, beer is something like 9 months old by now. Served around 50 degrees.

Appearance - Poured into a snifter, get a small, dark brown head which hangs around, leaving clingy foam on the edges. Intensely black. Almost oily looking. After a few minutes the foam is mostly gone but a swirl brings it back.

Aroma - Vinous, bitter chocolatey roast. Could still be a little young in the bottle. Hop aroma faint, but it seems the dry hops are adding a subtle complexity. As it warms the alcohol comes out a bit, light, fruity, low fusels.

Flavor - Dry, dark chocolate. Balanced. Hops pretty mellow but definitely bring balance to this beer, lightening up the finish. I'm getting almost a dry red wine character too, kind of a brooding vinous quality with a light roast-acidity. This impression grows as the beer warms a bit in my glass. I was expecting more diacetyl based on our yeast selection and fermentation temp.

Mouthfeel - Full. Moderate "chewiness". Could be even fuller, silkier without being cloying. We mashed a little low out of fear. In hindsight we should have mashed to hit 1.037 as the recipe suggests. Carbonation level perfect: low enough to let the mouthfeel and sweetness shine through.

Overall - This is a big beer, but not huge. Chocolatey, roasty, and dry, but not barren. Between the crystal malt and the yeast character there is just enough sweetness to balance out the roast. I think a touch of oak could go really well in this beer and play nicely with the vinous qualities and aging roasted character, although too much oak would make this beer overly dry. Perhaps compensate with a little more crystal malt.

A pretty cool beer. It is quite different from most other imperial stouts I've tried, I guess the closest thing would be some of the real English ones (maybe Sam Smith's or Le Coq, but ours isn't nearly as minerally, acidic, or soy-saucey). I think this should age extremely well, at 8 months old it tastes great but I feel like it will only get better once those vinous qualities and dark fruit character develop more.

Monday, January 10, 2011

Cabernet Franc barrel Flanders Red

Even though our lambic from last year is nowhere near finished, we had so much fun brewing a barrel's-worth of beer last winter that we decided to fill another barrel this year. After tossing around some ideas, we settled on a Flanders red.

My first experience tasting a Flanders red was a disaster called Duchesse de Bourgogne. Man, that beer sucks. Between the intense salad-dressing balsamic vinegar aroma and the sickening saccharine-sweet finish, I was convinced I'd never have another Flanders red again. But after trying some of the different Rodenbach blends, and more importantly, Cuvee des Jacobins, I realized that not all Flanders reds were sweetened vinegar-bombs, and had huge complexity: malty, funky, dry, and sour. A red-wine barrel seemed like it would complement this style nicely so we acquired a used Cabernet Franc barrel for this brew.

Compared to a lambic, which typically involves a turbid mash, spontaneous fermentation, and a multi-year residence in a barrel, brewing a Flanders red should be a cakewalk. Typically, Flanders reds are brewed with mostly-malt grain bills (some recipes include flaked corn or wheat), with a standard single-infusion mash, and a controlled inoculation of microbes. Unlike a lambic, which derives most of its acidity from Pediococcus, Flanders reds get theirs from mainly Lactobacillus. Thankfully, Wyeast offers their Roeslare blend year-round now, which is supposedly an approximation of the blend that Rodenbach uses, and it seems that homebrewers have good results using this blend.


We used a pretty complex grain bill, kind of a hybrid between the recipe in Brewing Classic Styles and the one over on Mad Fermentationist. Ten gallons were brewed ahead of time to build up yeast and microbe numbers. Overall we wound up with about 58 gallons of 1.060 wort - a little high for the style, but whatever. This thing will probably be sitting in oak for 2 years before bottling, so a little extra gravity will probably be a good thing.


Flanders red v1

60 gallon batch (brewed 10 gallons or so at a time)
brewed 1/1/2011

34.4 lbs Munich malt (Weyermann type I)
34.4 lbs French pilsner malt (Malteries Soufflet)
34.4 lbs Vienna malt (Weyermann)
4.7 lbs Aromatic
4.7 lbs Caramunich (56 L)
4.7 lbs Wheat malt
4.7 lbs Special B

9.5 oz EKG @ 60 minutes

cast out ~56 gal @ 1.060 (approx 76% brewhouse efficiency)


Barrel full of wort, chugging away!

UPDATE:

Thursday, December 9, 2010

How to Make Bacon

Bacon is one of the best tasting things on Earth, yet its identity is shrouded in mystery. What is bacon? How is it made? How long does it take? Can you make it at home?

Yes, you can indeed. Here is the basic process:
  1. Get a pig belly
  2. Apply a dry cure for at least a week
  3. Rinse off salt
  4. Hang to dry for a day or two
  5. Cold smoke ~12 hours
  6. Slice, fry, eat
As you can see, bacon is indeed labor intensive, requiring at least 10 days to make. But homemade bacon has several advantages over store-bought bacon:
  1. No nitrites. Commercial bacon is cured with 'pink salt' which preserves color and helps protect against botulism, but also has been implicated as a potential carcinogen. Unless you are eating your bacon raw, botulism is not really a concern here as the toxin is destroyed during cooking. According to the World Health Organization, 5 minutes at 185 F destroys botulinum toxin, conditions easily achieved during pan-frying.
  2. Will keep very well and for a long time
  3. Can cut into any shape and thickness desired (great for soups and chilis - can cut into large cubes or strips which maintain their texture far better than sliced bacon)
  4. Superior flavor and 'cookability'. Commercial bacon is typically injected with cure then injected with water to increase weight. With homemade bacon, being dry-cured then hung to dry, the bacon comes out far less 'flabby' and doesn't spatter nearly as much in the pan since the water content is so low.
  5. Cheaper than commercial bacon.
  6. Impress your friends.
Step 1: Get a pig belly

Pig bellies can be found at most self-respecting butchers. At the very least they can order you some. I would recommend doing a big slab (maybe 10 lbs at a time or more) because making lots of bacon is the same amount of work as making a little. Also, it keeps forever and makes a great gift. Sometimes pig bellies are also called "rib-sides" - these are actually from the tips of the ribs to the nipple-line, and I've found they aren't quite as fatty (and therefore not as good for bacon) as the center of the belly. What we are looking for in bacon is the abdominal oblique muscles surrounded by fat.

Some bellies will still have the skin: whether you want to leave this on or trim it off is a matter of preference. I prefer to trim it because a) the cure and smoke will penetrate better, and b) it can burn and get hard when you fry it.


Step 2: Dry cure

The goal of the cure is to draw water out of the meat and to preserve it by introducing salt. Most bacteria don't have a chance in such a salty environment. I like a ratio of 2:1 salt to sugar. For a 10 lb slab, 2 cups kosher salt and 1 cup brown sugar is plenty (in fact, perhaps overkill- you might try 1.5 cups salt to 0.75 cups sugar). Too much sugar and the outside could burn when you cook it. Pack the belly in the cure and stick it in the fridge. It will give off lots of liquid in the first couple days. Ideally you should keep the belly above this liquid, but I've left it submerged in the liquid for 2 weeks with no ill-effects.

As for curing times, I'd recommend at the very least 1 week, ideally two weeks. I've cooked up samples at only 4 days in the cure, and they still act like regular pork at this stage. By two weeks, the meat is thoroughly salted the texture has changed to a firm, dense, ham-like consistency.


Step 3: Rinse salt

I like to 'freshen' the bacon. This will pull out some salt that has penetrated the meat. This sort of step is typical in the production of lox - you want to cure the fish but don't want it to be overly salty. You will want to soak the bacon in a few changes of fresh, cool water - I'd recommend at least a couple hours. If you don't freshen enough and your bacon is too salty, it can still be rectified immediately prior to cooking by soaking the slices for about 30 minutes in fresh water, so don't worry if your bacon comes out too salty.

Step 4: Hang

This is where you allow the outside to dry and form a pellicle. This is an important step that really helps develop the texture of the meat and helps during the cold-smoking process. Smoke doesn't 'stick' to wet surfaces very well so you need to dry your bacon. Hang the freshened meat somewhere with low humidity. A fridge is perfect if you have the space. In a fridge it will take about 24 hours. You could also do it in a basement or something and aim a fan at it and do it for a little less time. Basically you want the outside to be tacky to the touch so the smoke will penetrate the meat.


Step 5: Cold smoke

Cold smoking is a process where you apply smoke to a food but no heat. This maintains the texture of the meat, and, more importantly, you can apply smoke for a much longer amount of time than hot-smoking. In hot smoking (which is basically barbecue) you cook and smoke simultaneously. I can cold-smoke a bacon for 12 hours (or longer), but if I were to hot-smoke for that long I would have rendered most of the fat and burned most of the meat.


Making a cold smoker is easy and cheap. You will need a cardboard box, a soldering iron, a tin can, and some wood chips. Below is a photo of my cold-smoking rig. Basically you just want to fill the can with some wood chips, stick in the soldering iron, and put this in the box along with your meat. The soldering iron will smolder the wood slowly but produce almost no heat. Also, because of the very limited oxygen in the can, the wood will not flame up and burn (which would also create heat and bitter smoke). In general my smoker will run about 10 degrees F above ambient, so ideally you would do this when it is cool outside.

Hang the bacon in the cardboard box, and let it smoke for about 10-12 hours. Big fatty slabs of pork can take this level of smoke-abuse. You will need to give the can a shake every hour or so, and every couple hours you might need to change out the wood chips. My favorite wood for bacon is hickory, but feel free to experiment with other woods (oak, applewood, pecan, etc. should all be good choices). I strongly recommend you soak the wood chips in water prior to use: this will tame the harshness of the smoke and create a slow smolder. If you smoke with dry wood chips, the smoke will be harsh and sting your eyes - not what you want on your food.


Step 6: Eating

Now that your bacon is cured and cold-smoked, it is ready for frying and eating. Slice it however you like- I find it is easier to make thin slices if the bacon is partly frozen first.


Anyways, that's it. Now you have 10 lbs of slab bacon that you can cut however you want. Large cubes are fantastic in soups, beans, pasta, chili, etc.

Sunday, November 7, 2010

Robust Brown Ale

There are few styles more appropriate for the Fall season than English Brown ale. But, I am frequently disappointed by many commercially-available Browns, often being too thin and lifeless, and not very Fall-like at all. This recipe is an answer to that: I wanted to brew something that was identifiable as an English brown, but also robust and satisfying, with plenty of toasty notes and a solid bitterness. To achieve this, I decided to use fairly high proportions of brown malt and pale chocolate malt. I really liked what the pale chocolate contributed, kind of a muted roast, faint chocolate, deep toast character.

One trick we used for this beer was to make our own brown malt. Using the guidelines from the "All Things Homebrewing" blog, we got really close to real brown malt (we had a reference sample on hand), although ours seemed to be a bit more aromatic, doubtless because of the fact it was freshly toasted.

Old Toasty
Northern English Brown ale
5.5 gal batch, brewed 9/5/10

9 lbs Maris Otter
1 lb Crystal 60
1 lb homemade brown malt (made from Maris Otter)
0.5 lb Pale chocolate malt

1 oz Northern Brewer (8.1% aa) 60 min
1 oz Northern Brewer 20 min
1 oz East Kent Goldings (5% aa) 3 min

1.055 OG
1.017 FG
5.0% abv
45 IBUs

Yeast propagation: Wyeast 1968, used 3/4 cup slurry from previous batch (a bitter)
Water profile: "Mosher's Ideal Mild ale" (Ca++ 83 ppm, Mg++ 12 ppm, Cl- 92 ppm, SO4 112 ppm, Na+ 38 ppm, carbonate 106 ppm)
Single infusion mash at 156.5 F
Cast out 5.5 gal, 71% brewhouse efficiency
Fermented at approx 69 F

9/5 Brewed
9/11 at 1.020, got roused a bit
9/19 at 1.017. Bottled to 1.9 vols CO2

Review (10/23, about a month in the bottle)

Aroma - Toasty, light chocolate, light roasted. A little sour tang, almost like sourdough.

Appearance - Deep chestnut brown, ok clarity (not great), head small but retains, no lacing.

Flavor - Toasty malts, chocolate, hint of smoke almost. Robust malty body, some caramel sweetness. I'd say the malt bill is about perfect for what we were going for. Lasting bitterness which may be out of style, but is enjoyable.

Mouthfeel - Most of these bottles got overcarbonated, and I'm not totally sure how or why. I knocked out some of the carbonation in this sample by first pouring it vigorously into a pyrex glass. When the carbonation is knocked-out a bit, the mouthfeel is full and rich. Great.

Overall - When properly carbonated, this beer is awesome. Robust and satisfying but still very much a brown ale. Could reduce the IBUs to around 35 and maybe take the pale chocolate down to about 0.4 lbs. A little diacetyl might be nice in this beer, possibly try a different yeast strain (1084?).